One of the best aspects of Eloqua is how seamlessly it operates within your marketing tech stack – assuming you've right-sized and optimized your stack, of course.
There's no better example than Custom Data Object (CDO) record services. These infinitely handy little helpers allow a beleaguered admin or power user like yourself to make light work of mountains of data. Eloqua is a beautiful and flexible platform integration tool, so that CDO record services could lend themselves well to many different use cases.
Here, we'll focus specifically on how CDOs can be integrated with Salesforce using the Salesforce integration app and how you can use CDO record services to remove records that have been deleted on the Salesforce side.
Let's jump in!
Related: Want expert Eloqua help with this or anything else?
3…2…1…CDOs! (You thought we were going to say Contacts, didn't you?)
We'll work specifically with Salesforce object data for today's purposes. Eloqua's Salesforce integration app will let you import from any standard or custom object within Salesforce.
Our use case will import records from a Salesforce custom Label Tag object. Still, because this data isn't inherent to the contact and we need multiple Label Tag records per Eloqua contact, we don't want to send this data to the Eloqua contact record. These label records will also be used for segmentation, so we'll need them to be connected to the contact. This makes it a perfect use case for importing to an Eloqua CDO.
But what happens when someone deletes a record in Salesforce? We'll need a way not only to import the labels and connect them to Eloqua contacts but also to delete the labels if they're removed in Salesforce. No one wants outdated and inaccurate data gumming up the works, right?
To get this process up and running, you'll need to create an Eloqua CDO to house the imported Salesforce label data (You can check out Oracle's instructions on creating a CDO here). On the CDO, it will be essential to create a checkbox field (called ours Deleted in Salesforce) that the integration app will check if a label record has been deleted in Salesforce.
Note: If you need more than one CDO record per contact, as we do with this use case, keep in mind that your Unique Code Field will need something other than your email address. For our purposes, we'll be using the SFDC Label Record ID.
Next, you'll need to open up the Salesforce integration app. You can do this by:
- Going to Settings.

- Choosing Apps under Platform Extensions.
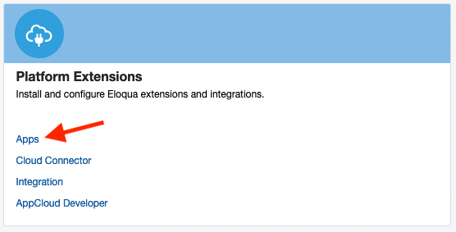
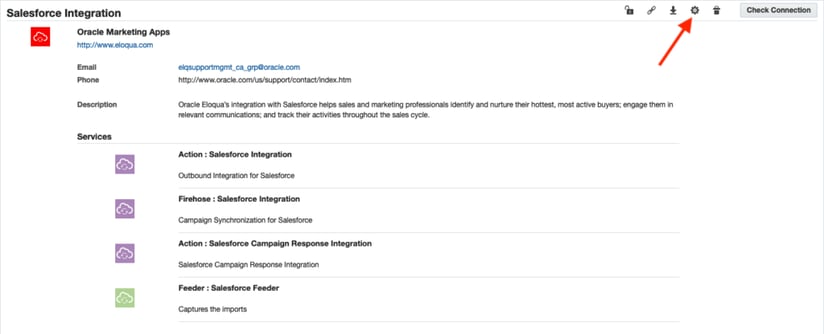
- And clicking on the Salesforce Integration app.

You'll need to create two imports, one for importing label records and the other for importing only deleted label records. You can do this by:
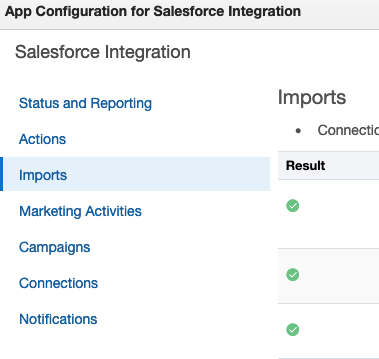
- Opening up the app settings.
- Clicking on Imports.
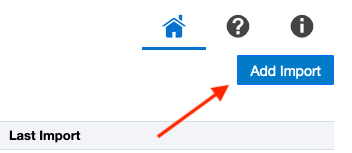
- Clicking Add Import.
Once the Add Import dialogue opens up, you'll want to:
- Give the import a descriptive name, like Get – Labels.
- Choose the Salesforce object you want to import from (for our use case, this was a Salesforce custom object called Label Tag, but you can choose whatever object you'd like).
- Choose the Eloqua object you want to import (Hint: this will be the CDO you created earlier).
- Click Create Import.
- At this point, the import is saved, and another set of options will open up. Next, you can add any SOQL filters you might need (Need info on creating a SOQL query? You can find that here.).
- Map the Salesforce data to the fields on your Eloqua CDO. Note that you can include some related objects in your import. For example, in our use case, an email address isn't available on the Label Tag object that we're directly connected to, but it is available on the related Contact object.
- Set the import rules and add any post-processing you'd like.
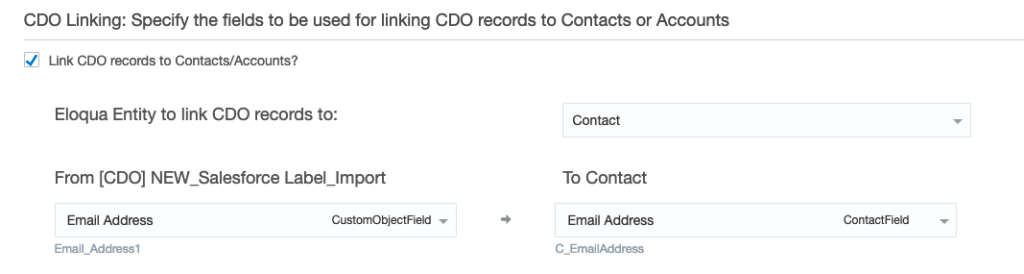
- Finally, you'll want to set up CDO Linking by checking the checkbox, setting the Eloqua Entity to link CDO records to Contacts, and mapping the CDO email address field to the Contact email address field.
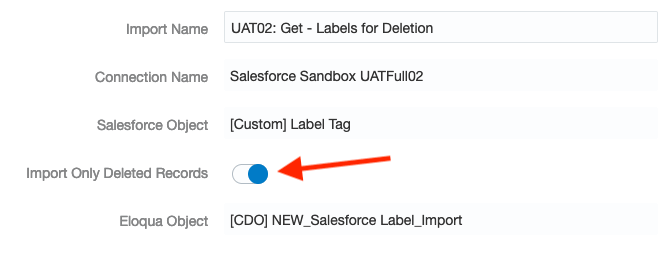
Next, you'll want to repeat the import creation process, but this time we'll call the import something like Get – Labels for Deletion. For this import, you'll connect to the exact Salesforce and Eloqua objects as you did previously, but this time you'll need to toggle on the Import Only Deleted Records setting.
The mapping for this second import is much simpler because we'll remove these records from Eloqua. For our use case, we only mapped the unique identifier, the email address, and most importantly, we used a text mapping for the Deleted in Salesforce checkbox field that will set it to True. You can see how we did that here:
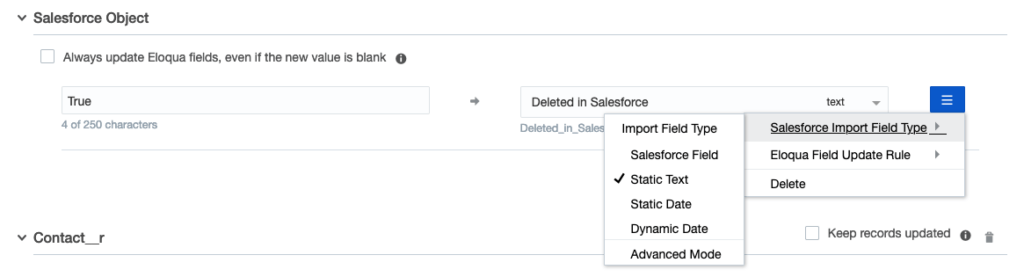
This is one of the most critical steps for the overall process, because having the Deleted in Salesforce field checked is how our program can tell which records to remove.
Better Data Integrity with CDO Record Services
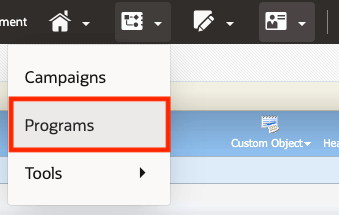
Next, we'll head over to Orchestration to create our program. You can do this by going to the top navigation and select Programs from the Orchestration dropdown.
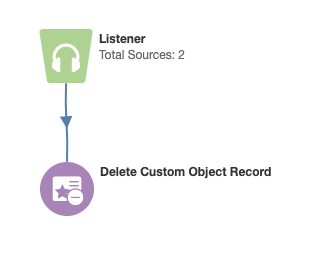
From here, choose the card that says Create a Custom Object Program. Once the program canvas opens, give it a name, and then drag a Listener step and a Delete Custom Object Record step onto the canvas. Finally, drag the connector line from the Listener to the action step and save the program. Don't worry about adding any sources to the Listener from the program canvas… we'll be doing that from the CDO. When you're done, your program canvas should look something like this:
Now that you've created a container (CDO) for your data, a way to transport it from Salesforce to Eloqua (integration imports), and the program that will remove records, let's talk about how we will manage the data with CDO record services.
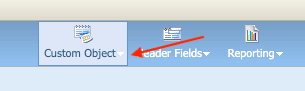
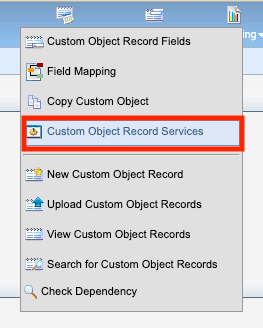
Navigate to the CDO you created earlier, click the Custom Object dropdown menu at the top right, and select Custom Object Record Services.
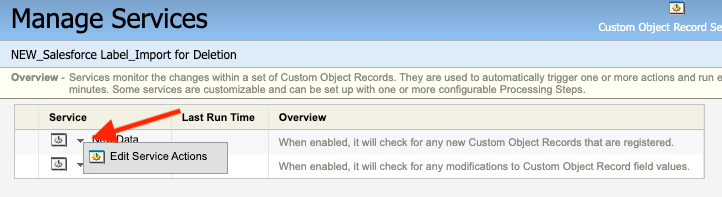
Once the Manage Services dialogue opens, you'll have two options: Set up services for new data that's been added to the CDO or for existing data that's been modified. You'll want to set up services for both of these options, which will account for someone making an error in Salesforce, adding a label, and then immediately deleting it. This will keep you from importing and storing new records that have already been deleted in Salesforce (We here at TPG are big fans of covering all our bases).
Let's start with New Data. You can click the dropdown arrow to the left of New Data and select Edit Service Actions.
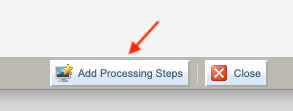
Next, you'll want to add a processing step by clicking the Add Processing Steps button at the bottom right of the Edit Service Actions dialogue.
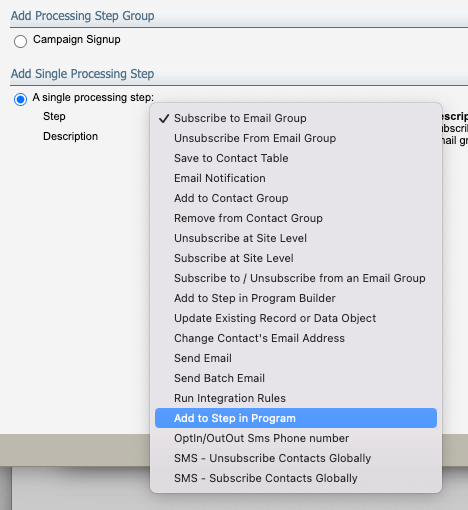
Adding processing steps will allow you to define conditional parameters to ensure this data is processed properly. In this case, we can add options such as Subscribe to Email, Unsubscribe, or Add to a Shared List. For this exercise, you'll want to choose Add to Step in Program (you can also add a description for the processing step if you'd like) and click Add.
Let's go further and edit the processing steps for what we might need.
First, you get another chance to add a description to this step. Next, you'll choose Contacts or Custom Object Records to define the entity type. Go ahead and choose Custom Object Records since that's what we're working with today.
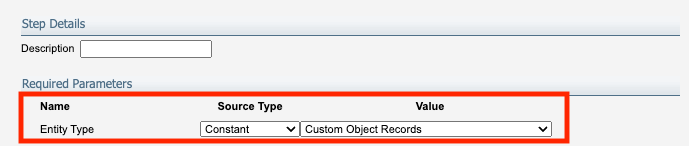
Next, you'll need to set any conditional parameters. For our use case, we're sending records to the same program every time, so you can choose Constant and then choose the name of the program you created earlier (Hint: most of the time, the program name will show up automatically).

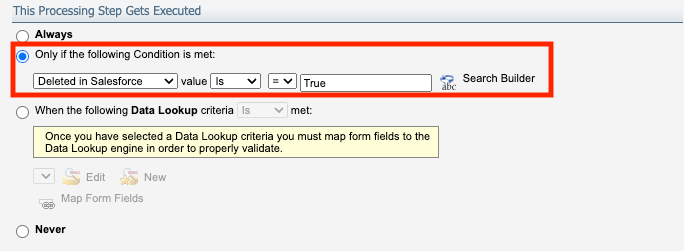
Finally, you can determine the circumstances or conditions under which CDO records get sent to the program. Here, you can see that we've selected the Only if the following Condition is met toggle and indicated that the Deleted in Salesforce field value must be equal to True.
Once you've done this, you can click Save and Close and then Close to get back to the Manage Services window. From here, you can repeat the above process exactly to create another service for Modified Data.
Finally, you'll need to enable each of the services, which you can do by clicking on the dropdown arrow next to both New Data or Modified Data and choosing Enable Custom Object Record Service.
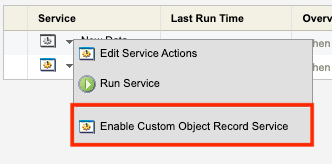
Once you've enabled the service, you'll see that the icon next to it is no longer gray.

Et Voila! Now you have a fully automated process to import the data you need and delete what you don't. Keep in mind that we only covered one use case. CDOs can help you manage all sorts of different data so you can save your contact fields for when they're indispensable. And CDO record services make it easy to ensure that your CDO data stays clean.
CDO record services are a powerful, versatile tool for segmenting and managing any data record from Salesforce. Once you take the time to get familiar with it, you'll find it indispensable.
Note: one of the best use cases for this process is to import and manage SFDC Campaign Members. This has yet to be possible due to an issue where deleted campaign members could only be imported if the related SFDC contact or lead was also deleted (which is not ideal for obvious reasons). As of January 2023, Oracle has indicated that they've found a workaround for this, and it will be available in an upcoming but not-yet-determined release.


